Friday, December 10, 2010

Sinfully Rich Chocolate Truffle Pie


We made this for Thanksgiving dinner this year and it was amazingly easy and so delicious!

12 ounces Semi-Sweet Chocolate Chips
1 1/2 cups Heavy Whipping Cream
1/4 cup Powdered Sugar
1 T Vanilla
1 (9-inch) Prepared Chocolate Cookie Crumb Crust (or make your own using 1 1/2 cups Oreo cookie crumbs and 1/4 cup melted butter)

1. In microwave dish combine chocolate chips and 1/2 of the cream. Cook on high for 1 to 2 minutes, stirring every 30 seconds until smooth. Cool to room temperature. Stir in sugar & vanilla. Set aside.

2. In small bowl, beat the rest of the cream until soft peaks form. Beat in chocolate mixture on high speed 1/3 at a time. mix well and spoon into crust.

3. Refrigerate at least 8 hours before serving. Garnish with whipped cream and chocolate curls if desired.

Enjoy!

Saturday, November 20, 2010

Lemon Ricotta Cookies with Lemon Glaze

I made these cookies for the Volunteer Dinner at my library and everybody loved them.

Lemon Ricotta Cookies with Lemon Glaze


Cookies:
2 1/2 Cups of flour
1 teaspoons baking powder
1 teaspoon salt
1 stick butter (softened)
2 cups sugar
2 eggs
1 (15 ounce) container whole milk ricotta cheese (I used low fat)
3 tablespoons lemon juice
Zest from one lemon

with a mixer beat butter and sugar until light and fluffy. Add the eggs one at a time until well mixed. Add the ricotta cheese, lemon juice, and lemon zest. Mix thoroughly and add dry ingredients. Spoon the dough onto a parchment lined cookie sheet. Bake for 15 minutes or until slightly golden at the edges. Let the cookies cool and frost with glaze.


Glaze:
1 1/2 cups powdered sugar
3 tablespoons lemon juice
zest from one lemon

Combine the powdered sugar, lemon juice, and lemon zest, stir until smooth. frost each cookie with 1/2 teaspoon glaze,

Monday, November 1, 2010

Pumpkin Recipes

As soon as the height of the summer heat passes and the days turn cooler, I start craving pumpkin foods! Here are some of my favorite pumpkin recipes.


Pumpkin Pancakes


2 cups flour
2 T sugar
4 tsp baking powder
1 tsp salt
1 1/2 tsp pumpkin pie spice
2 cups milk
1 cup pumpkin puree
1 tsp vanilla
4 eggs--separated
1/4 cup melted butter

Sift together dry ingredients. Combine milk, egg yolks, vanilla, butter and pumpkin puree. Stir into dry ingredients until just blended. Beat egg whites until stiff and fold into batter. Pour onto hot, oiled griddle about 1/3 cup at a time. Cook until tops bubble and turn and cook other side. (Note: sometimes I don't bother to separate the eggs and the pancakes still turn out great!)

These taste great with syrup, but my kids favorite way to eat them is to sprinkle mini chocolate chips on the warm pancakes, let them melt a little bit and then top with a dollop of whip cream. YUM!


Pumpkin Dump
(It tastes better than the name sounds, I promise! It is kind of like a pumpkin cobbler.)


1 (29 oz) can pumpkin
1 can evaporated milk
3 eggs
1 cup sugar
2 tsp pumpkin pie spice (or 1 tsp cinnamon, 1/2 tsp ginger, 1/4 tsp cloves)
1/2 tsp salt1 pkg cake mix (I like vanilla, but the original recipe calls for yellow or spice)
1/2 cup butter (1 stick)
1/2 cup chopped pecans (optional)

1. Preheat oven to 350 degrees. Grease a 9x13 pan.

2. In a large bowl, whisk together the pumpkin, sugar, salt and spices. Stir in the milk, then beat in the eggs one at a time. Pour into prepared pan.

3. Sprinkle cake mix over the pumpkin mixture, then sprinkle on the pecans. Drizzle melted butter over all. Bake in preheated oven for 50-60 minutes or until the edges are lightly browned. Allow to cool.

4. Serve with whip cream, refrigerate leftovers.

I have found that when I drizzle the butter, I sometimes get areas of dry cake mix in the end result, so what I do is take the butter (cold) and slice it thinly and cover the cake mix with the thin slices. It takes a little longer, but I think it is worth it.


Thanksgiving Sweet Potatoes
(OK, so technically this isn't a pumpkin recipe, but it tastes a lot like pumpkin pie, so I am including it anyway)

1 40 oz can sweet potatoes
¼ cup orange juice
¾ cup all –purpose flour
½ cup white sugar
1 tsp cinnamon
1 pinch salt
½ cup butter or margarine
1 ½ cups miniature marshmallows

1. Preheat oven to 350 degrees.

2. Place sweet potatoes in a 8x8 inch shallow baking dish and pour orange juice over.

3. In a small bowl, combine flour, sugar, cinnamon and salt; mix well and then cut in margarine. Sprinkle over sweet potatoes.

4. Bake for 30 minutes. Remove from oven, sprinkle with marshmallows and broil until browned.

Even people who are not sweet potato fans love this recipe (how could they not---let's face it, by the time you add all the extra stuff on top, they can hardly be considered a vegetable!) If you have extra time, I think it tastes better to use "real" sweet potatoes rather than canned. Just peel and slice 2.5 lbs of sweet potatoes, then boil until soft.

Saturday, September 18, 2010

Chili-Lime Mango Chicken Skewers

I got this recipe from Our Best Bites. I tested it out on Kevin, Sylvia, Victoria and Ken. They all said it was Yummy!! Caution this recipe makes A LOT.


6T olive oil
¼ cup fresh lime juice
Zest of 1 lime
1 t chili powder
¼ t cayenne pepper (I used double and I still didn't think it was spicy at all)
½ t salt
1 T sugar
4 boneless, skinless chicken breast halves, cut into 1-inch cubes
3 ripe but firm mangoes, peeled and cut into 1 1/2-inch cubes

(I watched this video to learn how to cut a mango and it worked out perfectly!)


Directions:
If you're using wooden/bamboo skewers, make sure to soak them in water for 20-30 minutes before you use them. Otherwise they'll fire right up on the grill!

In a large bowl, whisk together the olive oil, lime juice, lime zest, chili powder, cayenne, salt and sugar. Place in a zip-lock bag and add the chicken and mangoes, stirring gently to coat with marinade. Cover and refrigerate for 2-4 hours.

Prepare grill (or indoor grill pan)

Remove the chicken and mangoes from the marinade and thread onto skewers, alternating the pieces and dividing them evenly.

*When you're making any type of skewer, make sure not to smash everything together tightly. In order for the food to cook thoroughly and evenly, it needs room! The pieces threaded on should just barely touch each other, or not touch at all.


Arrange the skewers on the grill and cook, turning until the chicken is nicely charred and cooked through, 6-10 minutes.


I like to serve these with Jasmine rice. I bet they would taste great with cilantro rice too.


Friday, September 3, 2010

Sloppy Joes Aunt Linda style


Samantha posted this recipe on her blog today and I thought to myself, this family recipe needs to be on Wok The Dog too and so here it is. Thanks Aunt Linda for many years of good Joes, these are super easy and super tasty.

Sloppy Joe Sliders

1 lb ground beef {I use 90/10}

1 medium onion chopped finely

1 stalk celery chopped finely

Brown above ingredients in a skillet until beef is done and onions and celery are translucent. Then add:

1 can Campbell’s chicken gumbo soup ( yep you read it right and yes this is the secret ingredient)

3 Tbsp ketchup

1 tsp yellow mustard

2 Tbsp brown sugar

Bring to a boil and simmer on low heat for 15 minutes. Serve on “slider buns {smaller, pictured above} or regular hamburger buns.


Fruit Sorbet


While on our trip to Denver, Sylvia decided (and I agreed) that we needed to try out some of the sorbet recipes in her ice cream cookbook. They were pretty easy to make and turned out really yummy. We thought they had a better consistency when put in the freezer for a few hours, rather than eaten right out of the ice cream maker. My personal favorite was the Mango.


Raspberry Sorbet

1 cup sugar
½ cup water
1 heaping quart fresh raspberries, about 1 lb
Juice of ½ lime

Combine the sugar and water in a small saucepan and place over low heat. Stir until the sugar dissolves and the syrup is clear. Remove from the heat and cool to room temperature.

Place the raspberries in a blender with the cool syrup and lime juice. Blend until completely smooth, about 1 minute. For a smooth sorbet, pour the puree through a strainer to remove the seeds, otherwise freeze immediately in your ice cream machine according to the manufacturer’s instructions. When finished, the sorbet will be soft but ready to eat. For firmer sorbet, transfer to a freezer-safe container and freeze at least 2 hours.

Note: Frozen raspberries can be used--be sure to get the kind without added syrup.

Makes about 1 quart. Each 1/2 cup serving contains 125 calories.


Lime Sorbet

1 ¼ cups sugar
2 cups water
1 large egg white
2/3 cup fresh lime juice (about 6-7 large limes)

Combine the sugar and water in a small saucepan and place over low heat. Stir until the sugar dissolves completely. Raise the heat and boil the syrup 1 minute. Remove from the heat.

In a medium mixing bowl, lightly beat the egg white with a whisk or an electric beater until foamy, about 10 seconds. Slowly beat in the hot sugar syrup. Continue to beat until the meringue cools down slightly. Add the lime juice. Cover and refrigerate until cold or overnight. The mixture will have foam on top, but will incorporate into the sorbet when it freezes.

Stir the chilled mixture, then freeze in your ice cream machine according to the manufacturer’s instructions. When finished, the sorbet will be soft but ready to eat. For firmer sorbet, transfer to a freeer safe container and freeze at least 2 hours.

Makes about 3 cups. Each ½ cup serving contains 180 calories and 0 g fat.
 
 
Mango Sorbet

1 cup sugar
¾ cup water
2 ripe mangos about ½ lb each
¼ cup orange juice concentrate
Juice of 1 lime

Combine the sugar and water in a small saucepan and place over low heat. Stir until the sugar dissolves completely and the syrup is clear. Remove from the heat and allow to cool to room temperature.

Peel the mangoes and cut as much of the fruit as you can away from the large pits. Place mango and orange juice concentrate in a blender and blend until smooth. Add the cooled syrup and lime juice and lend until completely smooth, about 30 seconds. Cover and refrigerate until cold or overnight.

Stir the chilled mixture, then freeze in your ice cream machine according to the manufacturer’s instructions. When finished, the sorbet will be soft but ready to eat. For firmer sorbet, transfer to a freezer-safe container and freeze at least 2 hours.

Makes about one quart. Each 1/2 cup serving contains 150 calories.

Thursday, July 29, 2010

Chocolate Covered Strawberry Cake


The production people left three full cartons of strawberry ice cream in our freezer when they left. I was having the missionaries over for dinner, so I decided to invent a way to use some of the ice cream up. I generally think that all desserts should involve chocolate, so I created this "chocolate covered strawberries" cake. It actually turned out really yummy, and I am going to do a variation of it for the quints birthday this week.

1 box Devils Food Cake Mix
1 1/4 cup semi-sweet Chocolate Chips (divided)
1 1/4 cups Water
1/2 cup oil
3 eggs
1 1/2 cartons strawberry ice cream
1 tub Cool Whip
3 Strawberries for garnish (optional)

Preheat oven to 350 degrees. Finely chop 1 cup of the chocolate chips and set aside. Combine cake mix, water, oil and eggs in a mixing bowl. Mix on low speed for 30 seconds, then for 2 minutes on medium speed, scraping bowl as needed. Stir in chopped up chocolate chips. Pour into two 8-inch cake pans. Bake at 350 degrees for 31-35 minutes.

Remove pans from oven. Cool in pan 10 minutes, then transfer to cooling rack to cool completely. When cakes are cool, use a large knife to slice off any peaks that formed when cooking. Wrap each layer in plastic wrap and freeze.

Once cakes are frozen, remove from freezer and slice each cake in half to form a total of four circular layers. Re-wrap and freeze each layer. Build the cake by working on one layer at a time. Soften 1/3 of the ice cream (1/2 of a container) in a large bowl. When softened, use spoon to mix it up a little so that there are no hard lumps. Remove one layer of cake from the freezer. Spread ice cream over cake layer and return immediately to the freezer. Repeat with the next 2 layers, adding them to the top of the previous layer when finished. Top with the remaining cake layer. Freeze until solid.

Remove frozen cake from freezer. Using a rubber spatula, evenly spread cool whip on cake. Cut strawberries with a V to remove stems, then in half lengthwise to make a total of six "heart" shaped halves. Place strawberries in a circle on top of the cake. Place the remaining 1/4 cup chocolate chips in a Ziploc bag. Microwave in 20 second intervals at 50% power until chips are melted. Knead bag with fingers to mix, then snip a small corner of the bag. Drizzle chocolate over the top of the cake. Return cake to freezer.

Freeze until hard. When ready to serve, run a large knife under hot water and dry it off for easier slicing. Enjoy!


Sunday, July 11, 2010

Bananna-Blueberry Streusel Muffins


Muffins
1/2 cup butter, softened
1/2 cup packed brown sugar
1 1/2 cups (3 medium ) mashed ripe bannanas
1/4 cup milk (or sour cream)
1 teaspoon vanilla
2 eggs
2 cups flour
1 teaspoon baking powder
1 teaspoon baking soda
1/4 teaspoon salt
1 cup fresh or frozen blueberries (do not thaw)

Streusal Topping
3 Tablespoons flour
2 Tablesoons firmly packed brown sugar
1/2 teaspoon cinnamon
2 tablespoons butter
1/4 cup chopped nuts (optional)

1. Heat oven to 375 degrees. Grease bottoms only of 18 muffin cups or line with paper baking cups. In large bowl, combine 1/2 cup butter 1/2 cup brown sugar; beat until fluffy. Add bananas, milk, vanilla and eggs; blend well

2. Add 2 cups flour, baking powder, baking soda, and salt; gently stir in 1 cup blueberries. Fill muffin cups 3/4 full

3. In small bowl, combine 3 Tablespoonss flour, 2 Tablespoons brown sugar and cinnamon; mix well. With pastry blender or fork, cut in 2 Tablespoons brown sugar until mixture is crumbly. Stir in nuts. Sprinkle over batter.

4. Bake at 374 degrees for 18-23 minutes (unless your using Megan's oven, than it's anybodys guess) or until toothpick comes out clean. Cool three minutes remove from pan and ENJOY!

Tuesday, July 6, 2010

Going Bananas here in Virginny


Yep, it's another BANANA recipe from me and you're probably beginning to wonder if banana's are the only thing I ever cook with. With the heat and humidity here in olde Virginny it just seems like our bananas ripen much faster than we can eat them.

This past month I've tried 2 more banana bread recipes and a cake. The breads were okay but I'll probably not make them again. I think I've found the best banana bread recipe which I've already posted on this blog, Banana Coconut Lime Bread. The cake recipe I tried is worth passing on to you, I made it for Father's Day and it was a hit.

"Qu'ils mangent de la brioche" has been attributed to Marie Antoinette although there is no record of her ever saying it. In the Nelson family we always thought it should have been "Let them eat pie" but lately I've found myself making more cakes than pie and so I'm back to saying, "Let them eat cake". I've found that one cake will serve 14 family members after Sunday dinner and that makes for an easy dessert in my opinion.


I found this recipe at a food blog HERE , and I used one of the pictures taken by Leigh Anne from the this blog below.

Banana Cake

4 very ripe mashed bananas
1 box Duncan Hines WHITE cake mix (I used a yellow cake mix because that's what I had on hand QV)
3/4 cup water
1/4 cup oil
3 whole eggs
3//4 tsp baking soda
1 tsp baking powder

Mix all ingredients except bananas for 2 minutes, medium speed. Add bananas and blend well. Bake in two 9" greased and floured round cake pans, following baking recommendations on box. I think about 25 minutes or until a toothpick comes out clean. (The cakes were really high after cooking in the 9" pans QV )

Whip a pint of whipping cream, LIGHTLY sweeten with powdered sugar and a tsp of vanilla.

Filling: 1 large box of cooked banana cream pudding (NOT the INSTANT) (I used Vanilla pudding as I thought the Banana cream would make the whole cake TOO banana flavored QV)

Make pudding according to directions on the box and cool completely. Slice 3 additional firm ripe bananas. Split the layers in half, putting pudding & sliced bananas onto 2 layers, and the whipped cream on the others. Frost the whole cake with whip cream & sprinkle chopped walnuts on top. (Next time I'll use Cool Whip Lite and I put chopped pecans on top of the cake instead of walnuts. QV) This cake can be put together ahead of time (like several hours) but needs to be refrigerated until it is eaten. I used Dr Oetker Whipit in the whip cream, it's a terrific stablilizer.

The top layer you're looking at should be whipped cream with another split layer on top with the pudding and bananas. This gives you the idea of how the pudding/banana layer should look though.

And this is how the cake looked on Father's Day before we ate practically every ounce of it.


Monday, July 5, 2010

Sarah's Kielbasa

I heart Kielbasa. I think it's better than Bacon. (SHOCKING!) My love comes from childhood when my Dad used to cook. Most of his dinners included Kielbasa. Have you every had spaghetti with Kielbasa? Seriously it's the best. Back to the main point.

One day while talking to my sister Sarah I whined that I wanted to make Dad's Kielbasa. But my sister said she had a better way to make it. And she was right.

6 large potatoes peeled and chopped
10 carrots peeled and chopped
1/2 of an onion, chopped
1 package Skinless Kielbasa, sliced
Seasoning Salt

Start chopping like you've never chopped before. Combine Kielbasa, carrots, potatoes, and onions in a large bowl. Sprinkle a little seasoning salt and stir. Repeat until you feel like you have achieved the correct seasoning salt to Kielbasa ratio.


Grease a 9x13 casserole dish. Add kielbasa mixture. Cover with tin foil. Bake for one hour at 375 degrees. This allow the all flavors to marry. Yeah I said it. Marry. It's something all the chefs on the Food Network say.


Serve hot and enjoy!

Saturday, June 19, 2010

Roast Zucchini and Tomatoes

Last summer I actually had a garden that actually produced food stuffs. This summer not so much, but one thing I did experiment with a ton was zucchini (which I always say in my head like the little Jawa's from Star Wars--Hootini! hootini!). This was one of Alex's favorite experiments. It would be a great lunch or appetizer.

Ingredients:

fresh zucchini
fresh tomatoes
fresh basil
fresh garlic
fresh grated Parmesan cheese (optional)
low fat mozzarella
olive oil
balsamic vinegar (optional)
salt and pepper

Heat your oven to 375 degrees.Cut the zucchini into rounds about 1/3 inch think. Quarter or eighth the tomatoes depending on how big they are. Spread the zucchini and tomatoes on baking sheets. Chop up the basil and garlic together--with a little salt if you want the resulting paste to be finer.

Spread a little of the basil-garlic paste on each tomato. Drizzle the tomatoes with the olive oil and also the balsamic vinegar if you so desire. Sprinkle the zucchini with the Parmesan cheese and salt and pepper to taste. (You won't need much salt, if any at all). Drizzle the zucchini with olive oil.

Roast for about 45 minutes. The tomatoes should have crispy bits and the zucchini should be cooked completely. It smells divine when it is cooking.

Serve the tomatoes with a small slice of mozzarella. I like to put the cheese on right after it comes out of the oven so it has a chance to melt a little before serving. I think the cheese adds a nice creamy texture and cuts the bite of the vinegar, I don't consider it optional on the tomatoes.

I would say the serving size for a lunch is about half of a large tomato and a whole medium zucchini per person (if you like zucchini that is).

Tuesday, June 15, 2010

Rice Patties

I can't believe nobody has posted the recipe for Rice Patties yet. It's practically a staple in every Wilkinson, Carlson, Zenger, Shafer and Nelson household.

The Army Man made me rice patties first. IT WAS TERRIBLE. It was one egg, one pound of rice and three pieces of shredded cheese. Seriously. It was dry, it was tasteless and it was hard as a rock.

Lucky for me the My Marvelous Mother In Law saved the day and made Rice Patties for breakfast. It was a revelation. It was soft, it was egg, cheese and rice goodness. It was heaven with a little ketchup! Let it be known Mindy C. likes rice patties with salsa. I say ketchup or salsa is both equally tasty.

*Please note that this is how I make Rice Patties. This may or may not be how the rest of the Family makes it*

5 cups of cooked jasmine rice
3 cups shredded extra sharp cheddar cheese
6-7 eggs


Whip eggs in a bowl. Combine eggs with rice in a large bowl. Then gently fold in the shredded sharp cheese. Mixture should be soupy.


Cook on hot griddle on medium heat. Cook patties for three minutes on each side.


Serve immediately with ketchup or salsa.

Friday, June 11, 2010

Three Happy Guys

I'm beginning to think this is Rachelle and Victoria's food blog, come on Wilkinsons post some of your great recipes.

Yesterday the missionaries joined us for dinner offering me the opportunity to cook a hearty guy meal. You know ....meat, potatoes and calories. The menu I planned didn't disappoint the three guys at the table. Missionary Meatloaf (yep that's the name of the recipe), scalloped potatoes, green salad and 3 choices of ice cream. Two of the ingredients for this meal were cream and bacon which may be disgusting to some of you more healthy calorie counting blog followers but the magic ingredients that made the meatloaf and potatoes so tasty. When you walk and ride bikes everyday you can eat bacon and cream.


Missionary Meatloaf

2 pounds ground beef (93 %)
2 eggs, beaten
1 cup bread crumbs
1/2 cup rated carrot
1/2 cup chopped onion
1/4 cup barbecue sauce
1/2 cup milk
1 teaspoon salt
1/2 teaspoon pepper
1 teaspoon dried thyme
1 teaspoon dried sage
10 strips of bacon, uncooked

Meatloaf Sauce
1 cup of ketchup
1 cup of brown sugar

In a large bowl combine all ingredients except bacon and sauce. Mix well. Place in a 9x13 inch pan lightly sprayed with Pam and form into a 9x6 inch loaf. Cut bacon strips in half and place on the top of formed meatloaf. Bake at 350 degrees for about 1 hour. Remove from oven and drain off excess juices. Spoon on enough meatloaf sauce to cover top. Return to oven and bake for about 20 minutes longer or until done. Let stand for a few minuets before cutting.

Serve with the extra sauce, enjoy.

This recipe is from "The Essential Mormon Cookbook"

Friday, June 4, 2010

Drooling Over Food Vicariously


I posted this on Audrey's Blog Healthy Wife Happy Life but thought you all might enjoy it too...QV
As I attempt each day to eat within my meager 1250 calorie range I find myself enjoying and drooling over food vicariously through food blogs, the Food Network and magazines. I print out, mark, cutout and save recipes that I hope I can eat sometime in the future. Do any of you do this or is it just me?

This past week as I was perusing one of my favorite blogs this recipe caught my eye. I thought to myself, with a bit of tweaking I could eat these quesadillas right now and so tonight I am going to do just that.

Roasted Vegetable Quesadillas | WholeFoodsMarket
Ingredients
1 large yellow onion, thinly sliced
2 cups sliced red, green or yellow bell peppers
2 tablespoons extra virgin olive oil (
I will reduce this to 1 tablespoon)
Salt and pepper to taste
3/4 cup grated Monterey Jack cheese
6 flour tortillas (I will use reduced calorie tortillas. I'm also considering making it more like a tostada and using just one tortilla)
1 (15-ounce) can black beans, drained
3 tablespoons butter (
I'll skip this completely and either use a spray of Pam in the pan or lightly brush the tortilla with a bit of olive oil)
Chopped lettuce
1/2 to 1 cup salsa
1/3 cup sour cream (
I'll use low calorie sour cream)
1/2 cup guacamole (
I'll use a small slice of avocado)

Try layering shredded roasted chicken, pulled pork, or sliced skirt steak with the onions and peppers in these quick and easy stovetop quesadillas. (
No meat for now as I think the beans will provide enough protein) For vegetarians, sautéed mushrooms are a great addition, too.

Preheat oven to 425°F. Toss onions and peppers with olive oil, salt and pepper. Roast in oven, tossing occasionally, 6 to 8 minutes, or until golden brown. Sprinkle 2 to 3 tablespoons cheese on each of 3 tortillas. Top with roasted onions and peppers, beans and remaining cheese. Arrange remaining tortillas on top. Heat butter in a large skillet over medium high heat and, working in batches, brown both sides of each quesadilla until cheese is melted. Cut into quarters and transfer quesadillas to plates. Serve with lettuce, salsa, sour cream and guacamole on the side.
Serves 3 to 4.


I just finished my dinner and I thought this quesadilla was yummy although a bit messy to eat with just my hands. I used Fiesta Fajita Seasoning on the veggies during roasting with a sprinkle on the beans and La Tortilla Factory high fiber Smart & Delicious tortillas (50 calories each). I figure the calorie count with 1 tablespoon of sour cream and some salsa was around 380 to 400. I'm very full and will definitely be making these often.

Thursday, May 20, 2010

Egg White Omelet


In March, I spent four days in Hawaii with my parents. My dad was there for business meetings, so we got to stay at the Hyatt. They had a fabulous breakfast buffet with made-to-order omelets every morning. Ever since then I have been addicted to omelets and I have one for breakfast 3-4 days a week. The Hyatt version was not-so-good for you---it used lots of butter, eggs, full-fat cheese, bacon, etc. I don't want to even think about how many calories were in them! At home, I have come up with my own low-cal, low-fat, high-protein version that I think tastes every bit as good as the original!


Egg White Omelet

2 medium white mushrooms
1/4 of a medium green pepper
1 stalk green onion (just the green part)
3 slices (about 1 ounce) thin sliced deli ham (I use Oscar Mayer Deli Selects)
4 egg whites
1/2 ounce shredded fat free cheddar cheese

1. Preheat small skillet over medium heat. Chop veggies and ham.
2. Spray pan with nonstick cooking spray. Add veggies and cook until tender--about 2-3 minutes.
3. Add ham to the skillet and cook 1-2 minutes more.
4. Shove veggie/ham mixture to one side of the pan, and spray more non-stick spray, then repeat with the other side.
5. Spread veggie/ham mixture around in the pan, then pour the four egg whites on top. Cover with a lid. Cook until egg whites are mostly set.
6. Use a rubber spatula to loosen the sides and bottom of the omelet from the pan.
7. Flip the omelet by tossing it into the air and catching it with the pan (really it is easier than it sounds. Riley and Kaiya love to watch this part)
8. Spread cheese over half the omelet, then fold the other half over the top.
9. Using the rubber spatula, scoop the omelet onto a serving plate. Season with salt and pepper to taste.

Enjoy!

Tip: For easier prep, use about 1/2 cup Egg Beaters Egg Whites (just egg whites, not the original egg beaters) instead of separating the eggs yourself.

Nutrition Information: 1 Serving (entire recipe) = 119 calories, 22 g protein, 5 g carb, 0.3 g fat


My mom and I with the Hyatt Omelet Chef

Monday, May 10, 2010

Chocolate Covered Strawberries

I got a little overly ambitious for Mother's Day this year and decided to make chocolate covered strawberries for all the mothers in the ward who have "adopted" our kids. Riley and Kaiya and I dipped them all before church. I thought they turned out really pretty. The HEB magazine (the one we are on the cover of :-) ) gave us some ideas for different things to try. We did toasted coconut on white chocolate, crushed Oreos on both white and milk chocolate, turtle (with caramel and pecans) and regular milk chocolate with a white chocolate drizzle. Yum!


White Chocolate with Toasted Coconut


Milk Chocolate with White Chocolate Drizzle


White Chocolate with Crushed Oreos


All four kinds

Orange Drop Cookies......Oh so good

I have a friend name Angie and she brought these cookies over to our house. Megan and I devoured them. Poor Kevin didn't stand a chance.

Orange Drop cookies

1 1/3 cup shortening

1 1/2 cup sugar

2 eggs

4 Tbsp grated orange peel

1 cup orange juice

1 cup chopped nuts (optional)

4 cups flour (may need more)

1 tsp baking soda

1 tsp baking powder

1 tsp salt

Mix shortening, sugar, eggs. Stir in orange juice and grated orange peel. Stir dry ingredients together and blend in. Drop on ungreased baking sheet. Bake at 375 F for 8-10 min. I added an extra 1/2 cup flour to the recipe and they turned out great. When the cookies are cool ice them with the following.

Icing

5 Tbsp soft butter

3 cups powdered sugar

3 Tbsp orange juice

4 tsp grated orange peel

Very yummy! Enjoy!

Sunday, May 2, 2010

One Banana, Two Banana, Three Banana Four!

Did you know that bananas help to prevent kidney cancer?

It is believed by many experts that bananas were the first fruit cultivated by humans.

Alexander the Great first came across bananas in India in 327 B.C.

The song "Yes, We Have No Bananas" was released in 1923 and became a huge hit. It refers to the banana shortage at the time.

In 2001, Britain recorded 300 incidents of injuries related to bananas. The majority of these involved people slipping on banana peels.


If you buy a bunch of bananas you are almost guaranteed to have two become over ripe and then you have to make banana bread.

I love bananas and I usually eat one a day so that I won't have leg and toe cramps. Yep, all that potassium in bananas helps prevent those cramps. For the past 7 weeks I have been dieting and so am not eating as many bananas which means I've been making a lot of banana bread. Who eats the bread, KEN! I tried this new recipe the other day and it was very tasty/yummy. The recipe for Coconut Banana Bread with Lime Glaze can be found at Our Best Bites HERE

When I make it again,(and I will) I will use only 3/4 Cup of sugar as it was too sweet. The bread was yummier after it had aged for a couple of days.


Coconut Banana Bread with Lime Glaze

Sunday, April 18, 2010

Cup O' Chocolate-Coconut Bread Pudding


I just got Hungry Girl's newest cookbook and this recipe made me think of you, Sylvia! I haven't tried it yet, but it sounds yummy. Here is her description, "Hot, sweet, chocolate-coconut-marshmallow fun in a cup. This weird and wonderful dessert will become one of your new BFFs!"

One 25-calorie packet diet hot cocoa mix
Dash salt
1/2 cup fat-free liquid egg substitute
1/3 tsp coconut extract
2 slices light white bread
1 tsp mini semi-sweet chocolate chips
10 mini marshmallows

Combine cocoa mix and salt in a glass. Add 1/4 cup very hot water and stir until ingredients have dissolved. Add egg substitute and coconut extract, and stir. Set aside.

Toast bread and teaer into cubes. Spray a large microwave-safe mug lightly with nonstick spray. Add bread cubes and top with cocoa-egg mixture. If needed, stir gently to ensure bread is thoroughly soaked. Top evenly with chocolate chips and marshmallows.

Microwave for about 2 minutes and 15 seconds, until bread budding is set. (It will puff up once set.) Enjoy!

Makes 1 serving. Per serving (entire recipe): 215 calories, 2 g fat, 755 mg sodium, 33.5 g carbs, 6 g fiber, 11.5 g sugars, 19 g protein

Wednesday, April 7, 2010

A Late Entry For The Macaroni Wars . . .

Sorry I'm late, but I made this Southern Living version of mac and cheese for our Easter egg hunt luncheon.  We had "picnic style food" and I felt like mac and cheese was a perfect fit!  This recipe is TASTY and I think of all the recipes posted thus far, it may just have the fewest ingredients {read: no fail}.  Give it a try and tell me what you think:

Classic Baked Macaroni and Cheese

1 8 oz pkg elbow macaroni
2 Tbsp butter
2 Tbsp all-purpose flour
2 C milk
1/2 tsp salt
1/2 tsp fresh ground pepper
1/4 tsp cayenne pepper
1 8 oz block sharp cheddar cheese, shredded and divided

1.  Prepare pasta according to directions. Keep warm.
2.  Melt butter in large saucepan over medium-low heat; whisk in flour until smooth. Cook, whisking constantly, 2 minutes.  Gradually whisk in milk and cook, whisking constantly, 5 minutes or until thickened. Remove from heat. Stir in salt, peppers, 1 cup of cheese and cooked pasta.
3.  Spoon pasta mixture into lightly greased 2 qt. baking dish and top with remaining 1 cup cheese.
4.  Bake at 400 degrees for 20 minutes or until bubbly.  Let stant 10 minutes before serving.

Sunday, April 4, 2010

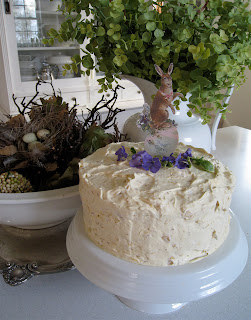
Easter Cake 2010


This years cake, it was yummy.

Friday, April 2, 2010

Peter Rabbit gives this two paws up!


Quick breads usually taste like cake to me and so I always feel a bit guilty eating them as if they were bread. This recipe takes away the guilt because it has grated carrots in it. Anything with grated carrots must be a healthy choice, right? I've also done some subsituting with oil and flours in this recipe attempting to make the bread even healthier. The subsitutions make for a dryer bread but still very tasty.

Banana Carrot Bread

2 cups of flour (sometimes I substitute some of the white flour with whole wheat flour, I say about 3/4 cup)
1 tsp baking soda
1/2 tsp salt
1/2 tsp cinnamon

1 cup (usually 2 bananas) mashed, ripe bananas.
1 cup sugar
3/4 vegetable oil (I substitute with a generous 1/4 cup canola oil and 1/2 cup of applesauce)
2 eggs (don't forget them, I did once; it was still eatable though.)
1 cup of finely grated, pared carrots
1/2 cup chopped pecans

Sift together flour baking soda, salt and cinnamon. Set aside combine bananas, sugar, oil and eggs. Beat with electric mixer at medium speed for 2 minutes. Stir in dry ingredients. Fold in carrots and pecans. Spread in greased and floured regular size loaf pan (I just spray the pan with cooking spray)

Bake at 350 degree oven for 55 minutes or until wooden toothpick comes out clean.

I don't have a very good oven, hence the big crack on top of the bread, it's not suppose to do that. It's not stopping me though, as I'm off to take a nibble with Peter.


Thursday, April 1, 2010

Green Chile Frittata

Melody, a friend of mine posted this on her facebook, and so I gave it a try. It's simple to make and very tasty. I believe you could make this up for any meal of the day. I halved the recipe when I made it.


Green Chile Frittata

10 eggs beaten
1/2 Cup flour
1 tsp baking powder
2 (4oz) cans diced and drained
1 16oz container low_fat cottage cheese
1 Cup shredded cheddar cheese
1/4 Cup melted butter

Preheat oven to 400*. lightly grease 9x13" baking dish

In a large bowl, mix eggs, flour, baking powder, and salt. Stir in the green chile peppers, cottage cheese, and melted butter. Poor into greased baking dish.

Bake 15 minutes at 400*, reduce heat to 325* and bake an additional 25-35 minutes.

When I made the half recipe, I did not bake it for 35 minuted. I inserted a toothpick, and took it out of the oven when the toothpick came out clean, I took it out at 29 minutes.

Waffle-mania

My mom gave me a book of a thousand waffle recipes (more like 100...but still), and I've tried a few and I'm going to post my two favorites (so far) here.


Broccoli-Cottage Cheese Waffles

Don't knock it till you try it. These are a savory waffle that can be served as lunch or an early dinner. Great for springtime or St. Patrick's day because they are bright green.

Ingredients:
  • 3/4 lb. Broccoli, trimmed. (I just got a regular bunch from the grocery store, seemed to work out fine
  • 1 C Cottage Cheese
  • 1 1/2 C Milk
  • 2 eggs
  • 2 C flour
  • 1 T baking powder
  • 1/4 t baking soda
  • 1 t salt
  • 1/2 t pepper
  • 4 scallions (thinly sliced, white part only)
  • 1 to 2 garlic cloves, pressed
  • 1/4 C olive oil
Cook the broccoli until it can be pierced easily with the point of a knife. Drain and cool for 10 minutes. Blend up the broccoli and cottage cheese with a food processor. (I used an osterizer, which took a little more shaking and stirring than a food processor, but blended the broccoli just fine.) Blend until completely pureed, about 90 seconds. Add the milk and eggs to the blender and blend for another 30 seconds.

Whisk together the dry ingredients until combined. Pour the blended broccoli over the dry ingredients and stir until combined. Add the scallions, garlic, and olive oil.

Make the waffles according to your waffle iron's directions.

When I made these we cut them in half, broiled them with a layer of cheddar cheese, and served them folded over like a calzone with a slice of tomato in the middle. The cook book suggested you eat them with a dollop of plain yogurt or roasted red peppers. You could even try them topped with Ratatoulli (from a previous post).

I have no idea what the fat and caloric intake is for these, but they seem pretty healthy, and they prevent cancer, I'm sure of it :).


Oatmeal-Banana Waffles

I just made these about an hour ago, and they were pretty tasty. They seem like a good way to get some whole grain without it being whole wheat (blech).

Ingredients:
  • 4 T (1/2 stick) butter
  • 1 C Old-fashioned oats
  • 1 C flour
  • 1 T baking powder
  • 1/2 t baking soda
  • 1/4 t cinnamon
  • pinch of nutmeg
  • 3 T packed brown sugar
  • 1 1/2 C buttermilk
  • 2 eggs
  • 2 medium-size, very ripe bananas, thinly sliced crosswise
Melt the butter and reserve for later. Whisk together the dry ingredients including the brown sugar. In another bowl, beat together the eggs and the buttermilk until well blended. Pour the liquid ingredients over the dry and mix until just combined. Mix in the banana slices and the butter.

Make waffles. You'll probably have to use a wooden spoon or metal spatula to spread the batter around your waffle iron since the batter is very thick. You may also have to wait longer than usual to cook the waffles for the same reason. They should be golden and crisp when done and fluffy in the middle.

Eat these with syrup, fruit preserves, or any of your favorite waffle toppings. I think it would be excellent with more fresh bananas and cinnamon sugar on the top or fresh raspberries and whipped cream.


You really should try the broccoli waffles, not only so you can make people panic, but so you have some veggies in a fun new way.

Tinker Bell's Magic

Several years ago I was talking to a friend about a dinner party I was hosting and she said, "I'll make dessert for you." I told her that wasn't neccessary, because she wasn't invited to this particular dinner party, but she insisted. Tinker Bell, as I sometimes call her, is a very good friend and also a very good cook. She told me that she had cut some cake recipes out of her local newspaper (hopefully, you do remember what a newspaper is) and that she wanted to try one of them. Orange/Pineapple Cake was the chosen recipe and it proved to be a scrumpteous choice! Needless to say, my guests were impressed and asked for seconds. This cake has now become an Easter tradition; it is the grand finale to our Easter feast.


Pineapple/Orange Cake

Cake:

1 pkg yellow cake mix (I always use Duncan Hines)
1/2 cup vegetable oil
4 eggs
1 (11oz) can mandarin
oranges, drained
1/2 cup plus 1 Tbsp orange juice
1 tsp vanilla

Frosting:

2 (8 oz) cans crushed pineapple with juice
1 pkg vanilla instant pudding mix (3 oz pkg)
1/2 cup powdered sugar
1 tsp vanilla
1 (8 oz) tub Cool Whip

Heat oven to 350 degrees. Grease and flour three round 9 inch cake pans. Combine cake ingredients in bowl and mix with hand mixer for one minute on low and then three minutes on medium. Mixture should be smooth with small bits of mandarin orange. Pour equally into three pans. Bake for 25 minutes until cake is spongy to the touch or a toothpick comes out clean. Cool for 10 minutes IN PANS on wire rack. Then remove from pans and cool completely on wire rack.

While the cake is cooling, make frosting. Drain pineapple juice, adding it to pudding mix and combining well. Add pineapple, powdered sugar and vanilla. Fold in cool whip.

To assemble cake, frost between each layer, then the outside of the cake.

You can add some toasted coconut to the top for decor purposes if desired.

This cake tastes best if you assemble it several hours ahead of time and then of course, keep it REFRIGERATED!

I like to decorate with pansies and blue vinca flowers for Easter another lovely option is orange slices and toasted coconut like the one Samantha made.

Oh, you high altitude folks may need to make some adjustments to the cake part of this recipe.

Enjoy! You'll lick the plate clean; I know I will on Sunday!


Monday, March 29, 2010

Not Your Typical Tin Foil Dinner

I am sure that most of you will not be shocked to know that I dislike almost everything about camping. One of the things I DO like is the food---there is something kind of fun about fixing your food over a campfire. I always loved the tin foil dinners we used to make. Ours were made with potatoes, hamburger, carrots and a little seasoning. When I found this recipe, I thought it sounded like a nice spin on the traditional tin foil dinners---and the best thing about it: no camping required!! I made them for dinner last night and they were a big hit! They are also healthier than their traditional counterparts (so you won't have to wait until you are off your diet to try this one, Auntie V!)

Foil Pack Taco Chicken

Preheat oven to 400 degrees. Lay out several (one for each dinner you want to make) pieces of heavy duty foil (If you don't have heavy duty, two layers of the normal kind will work). On each piece, layer the following:

1 medium red potato, thinly sliced
1 chicken breast (about 3.5 oz) rubbed with 1 tsp taco seasoning
2 T Salsa
2 T Cheese

Fold up sides and ends of foil, sealing the packet, but leaving room at the top. Bake for 35-40 minutes. Remove from oven and let sit 5 minutes. Puncture foil with a knife, to release the steam, then open and enjoy! Top with fat-free sour cream, if desired.

If made with fat-free cheddar cheese, each packet contains 300 calories, 37 g protein, 27 g carb, 4 g fat